Contact us
Get in touch with our experts to find out the possibilities daily truth data holds for your organization.
Persistent Monitoring
Natural catastrophe solutions

Tutorials
Dive into the workings of the Sentinel Application Platform (SNAP).
Pre-processing, georeferencing and exporting file for GIS platform from ICEYE high resolution data with the Sentinel Application Platform (SNAP).
In this session of ICEYE data tutorial, we will go through some simple steps to georeference and export the data we downloaded for use on other GIS platforms.
1. SNAP 9.0.0
Recommendation: If you have SNAP already installed with the old version (v.8.0 or older), please get it updated with the latest version.
2. Download free samples of ICEYE SAR data (SLC and GRD files)
Get started
1. Open ICEYE data on SNAP by clicking Open product then browse to the place the ICEYE example dataset is stored (H5 format)
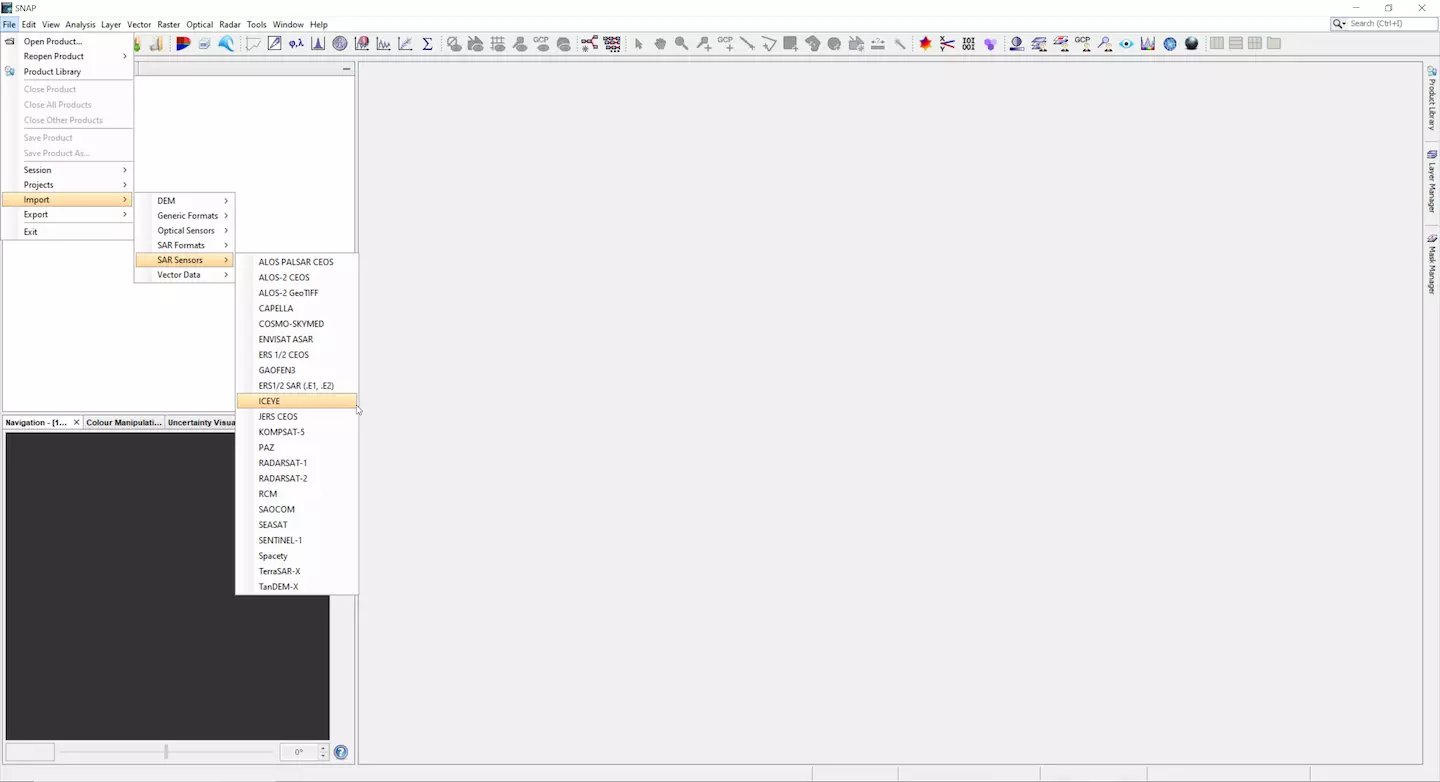
2. Import ICEYE’s sensors: Import > SAR sensors > ICEYE
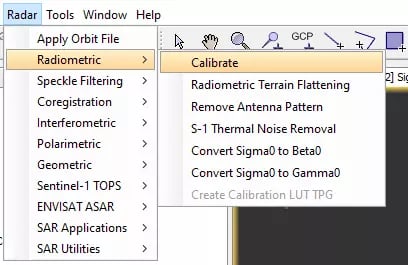
1. Radiometric calibration is applied to ensure quantitative comparisons between acquisitions. After calibration the pixel values represent the backscatter of the reflecting surface.
To run the Radiometric calibration, click Radar > Radiometric > Calibrate
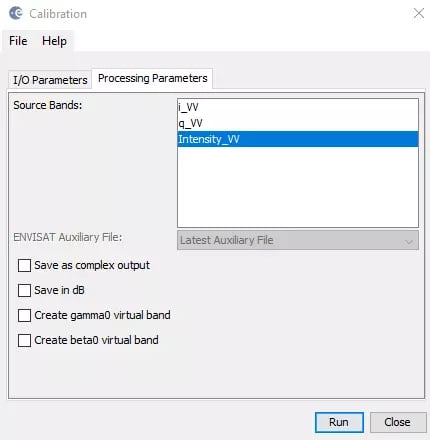
2. Commonly with SAR, dB values are used. Linear values are fine for visual inspection.
You can leave all options unchecked to receive calibrated linear values. Click Run to process.
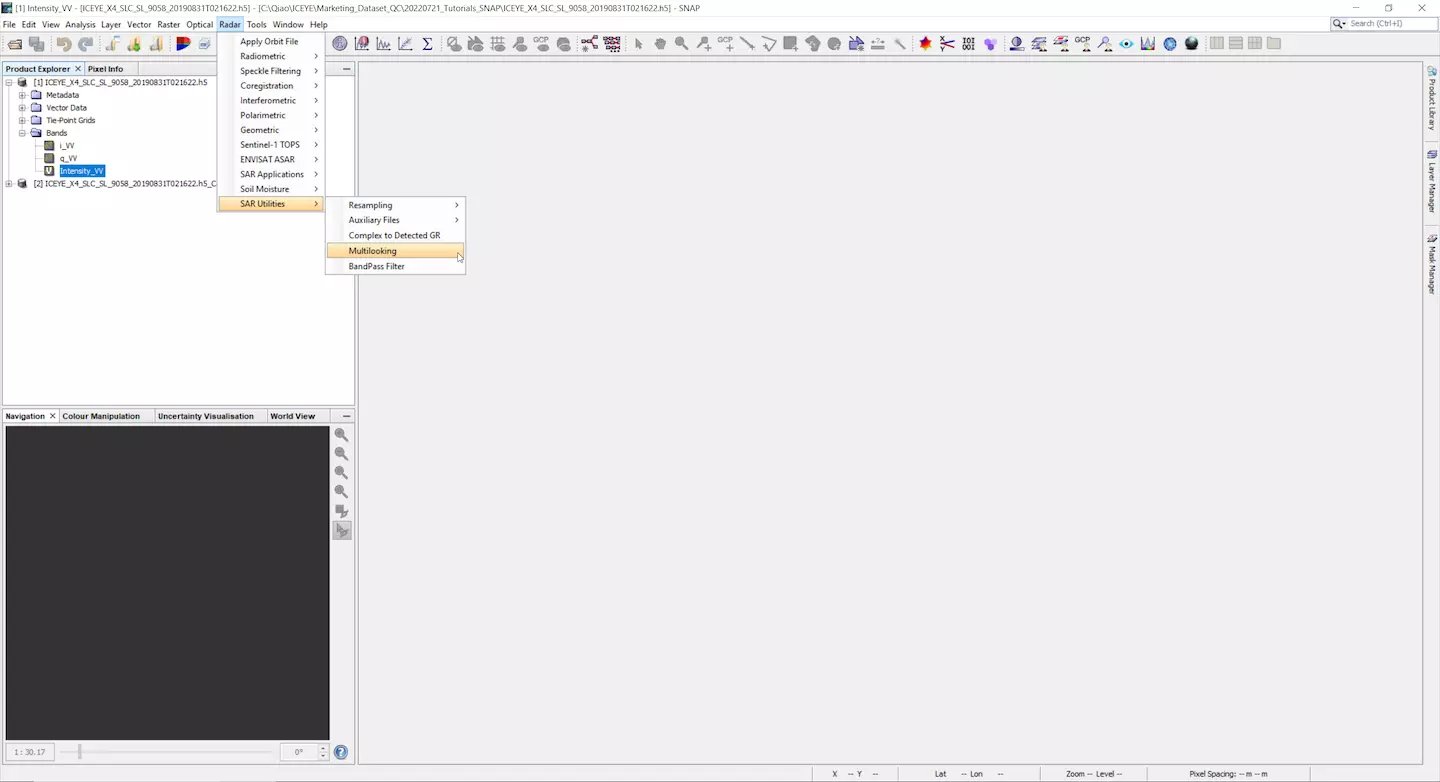
1. Ensure you choose Intensity_VV from the Bands drop-down list in the Product Explorer panel. Then click Radar > SAR Utilities > Multilooking
2. Select again Intesity_VV as Source bands from the Processing Parameters tab and specify the number of looks to be applied for the multilooking. You can also add optionally, the bigger the number of looks the coarse the resolution will become.
Then click Run and wait for the software to process.
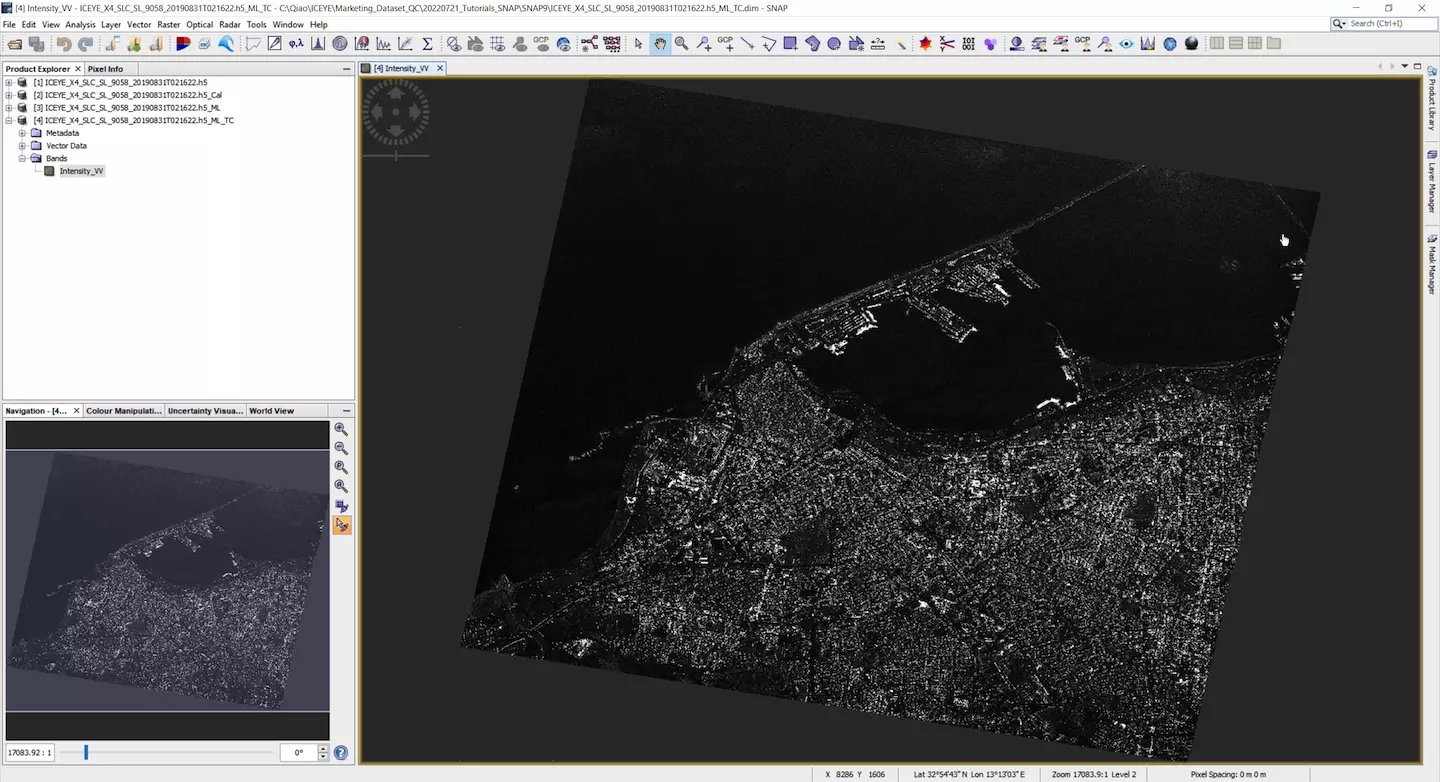
3. ICEYE SLC data after Multilooking processed
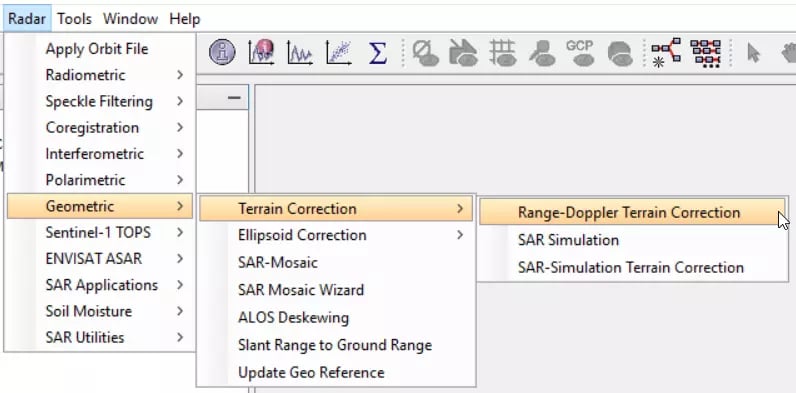
1. To georefence the image, we have to correct the image with Terrain correction. We choose this in the menu Radar > Geometric and then click the Range-Doppler Terrain Correction:
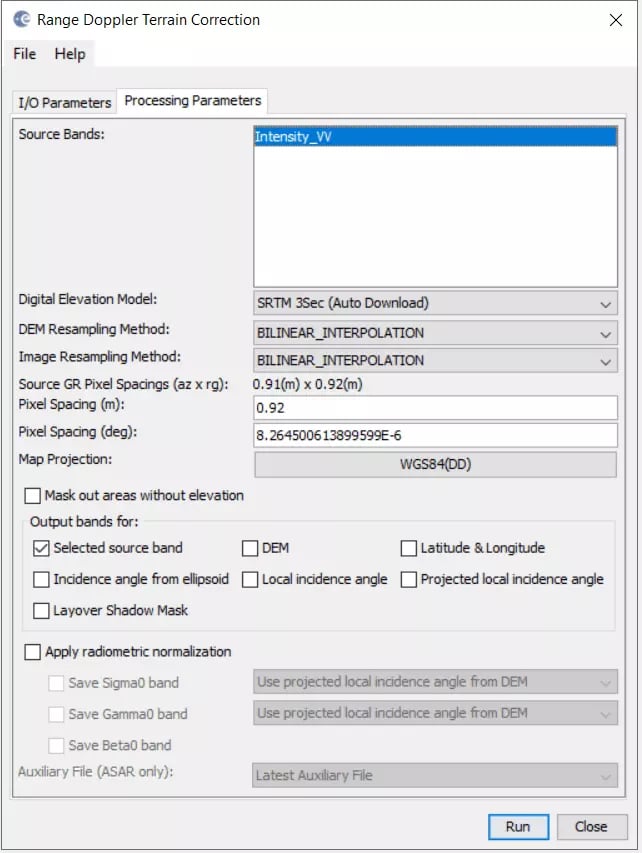
2. When the following menu opens, you can leave the default projection system (Map projections) to be set as WGS84 (DD) in the Processing parameters tab. You can also select any projection system that fits your AOI for certain. Then click Run to start the process.
3. ICEYE Spotlight SLC data after Geocoded

Get started
1. Open ICEYE data on SNAP by clicking Open product then browse to the place the ICEYE example dataset is stored (TIFF format)
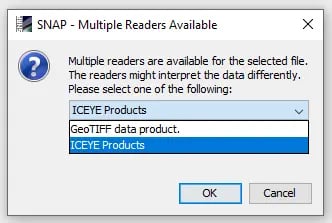
2. Choose ICEYE Products when asked
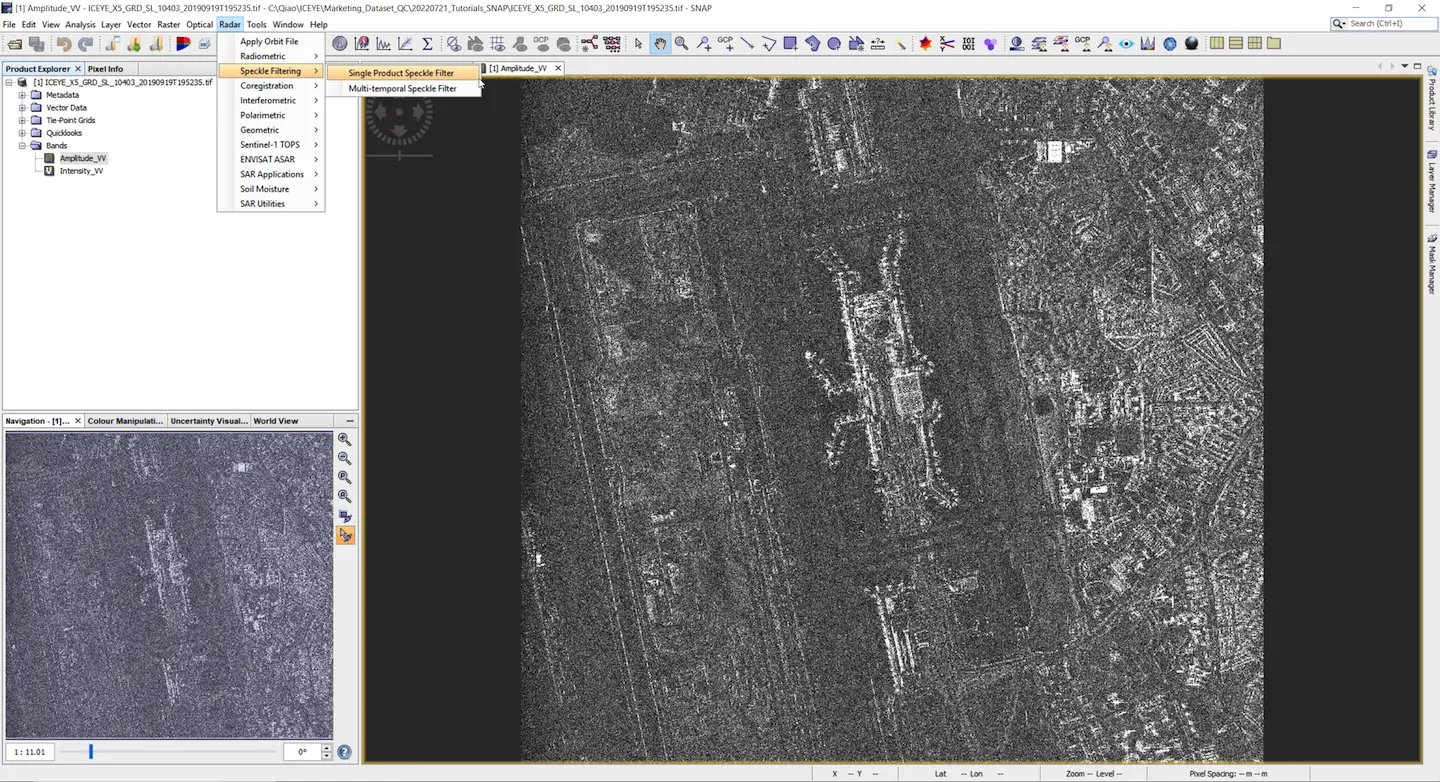
1. Ensure you double click Amplitude_VV from the Bands drop-down list in the Product Explorer panel. Then click Radar > Speckle filtering > Single Product Speckle Filter.
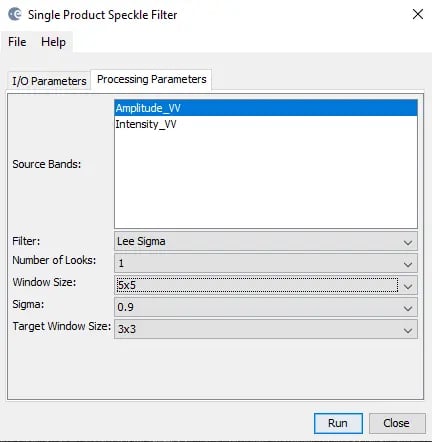
2. Lee-sigma is widely used and perform best compared to other filters. From the Processing Parameters tab, choose Lee Sigma from the Filter field with the following values to run the noise removal process. Then click Run and wait for the software to process.
3. ICEYE spotlight GRD data after Speckle noise removal processed
.webp?width=1300&height=814&name=SNAP_GRD_05_Raster_Subset_Spk%20(1).webp)
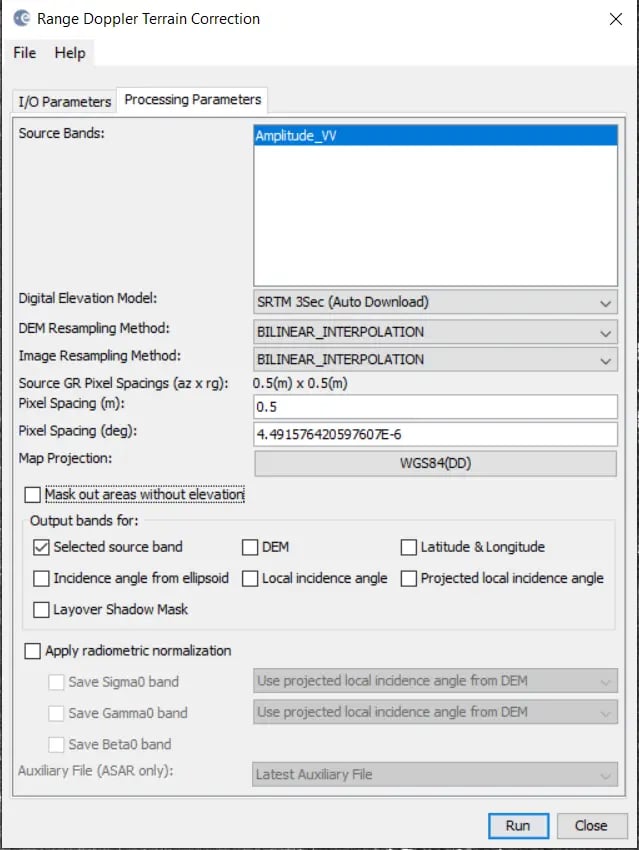
1. To georefence the image, we have to correct the image with Terrain correction. We choose this in the menu Radar > Geometric and then click the Range-Doppler Terrain Correction:

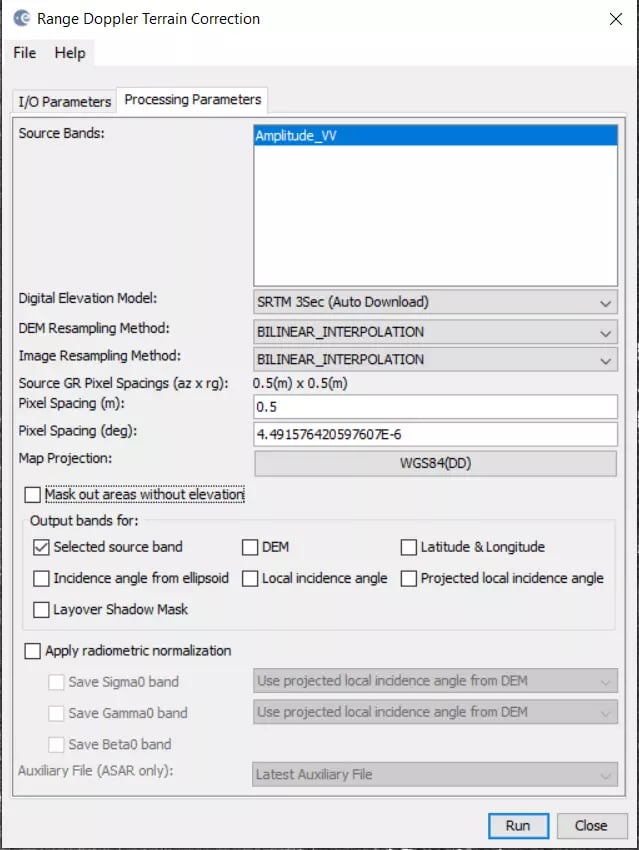
2. When the following menu opens, you can leave the default projection system (Map projections) to be set as WGS84 (DD) in the Processing parameters tab. You can also select any projection system that fits your AOI for certain.
Then click Run to start the process.
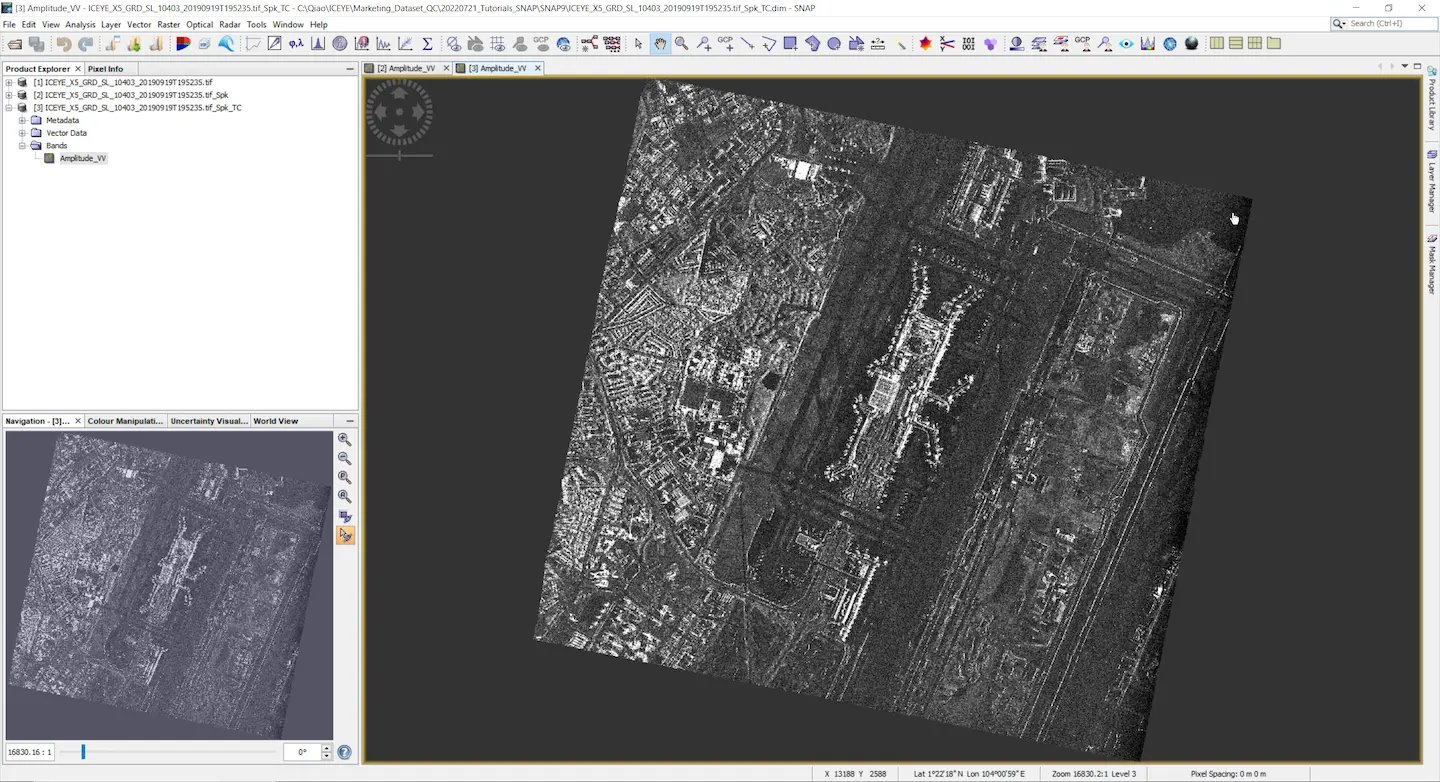
3. ICEYE Spotlight GRD data after Geocoded
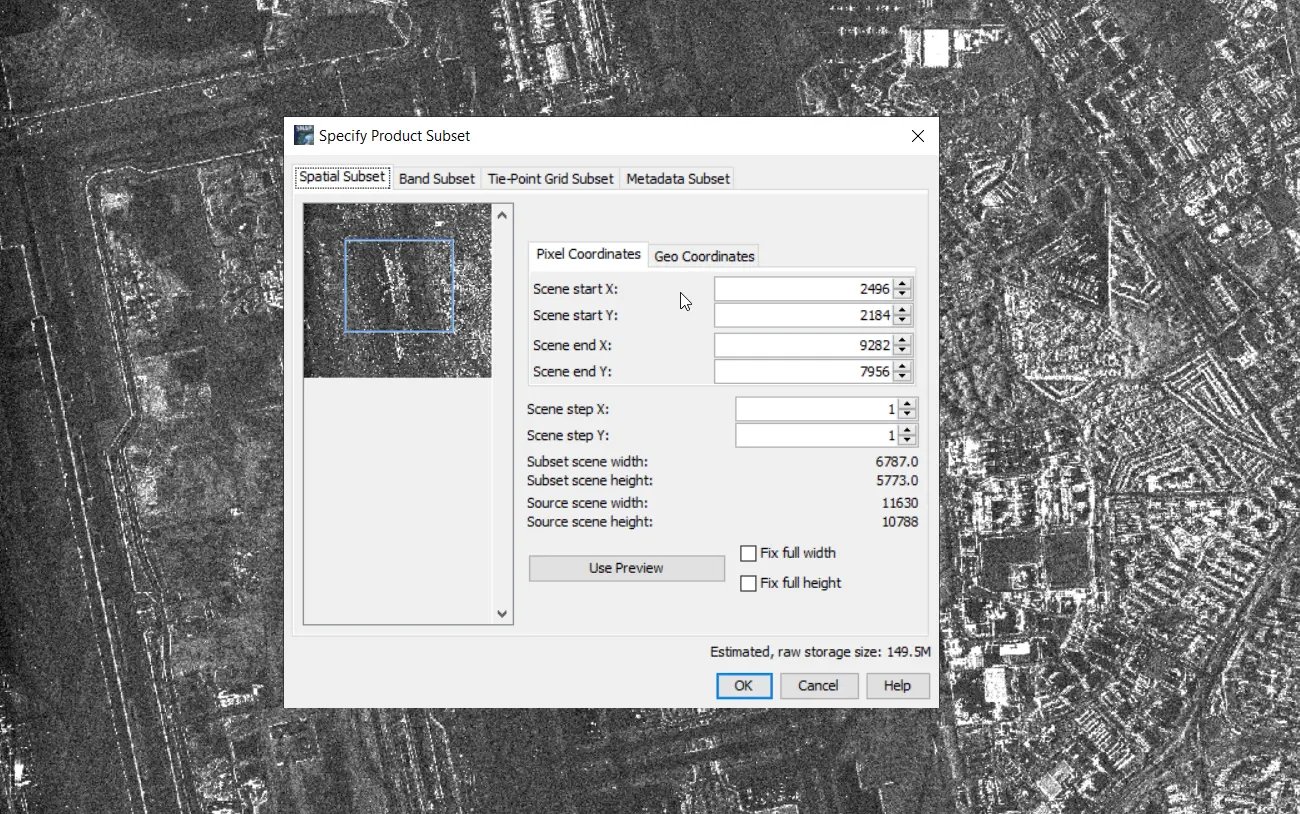
Point to Raster then select Subset. In the Spatial Subset tab. To specify Product Subset, you can set the value from Pixel Coordinates or Geo Coordinates to have your area of interest covered
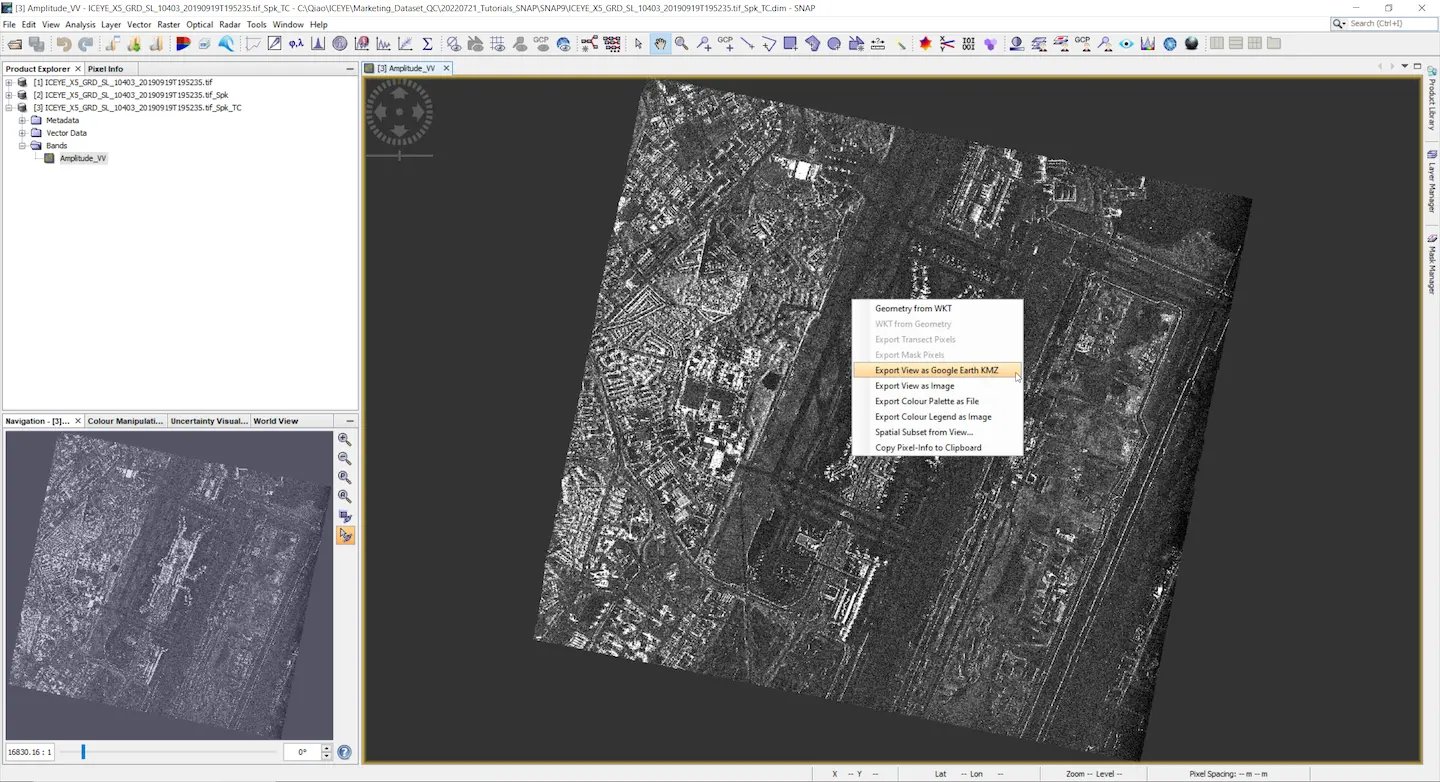
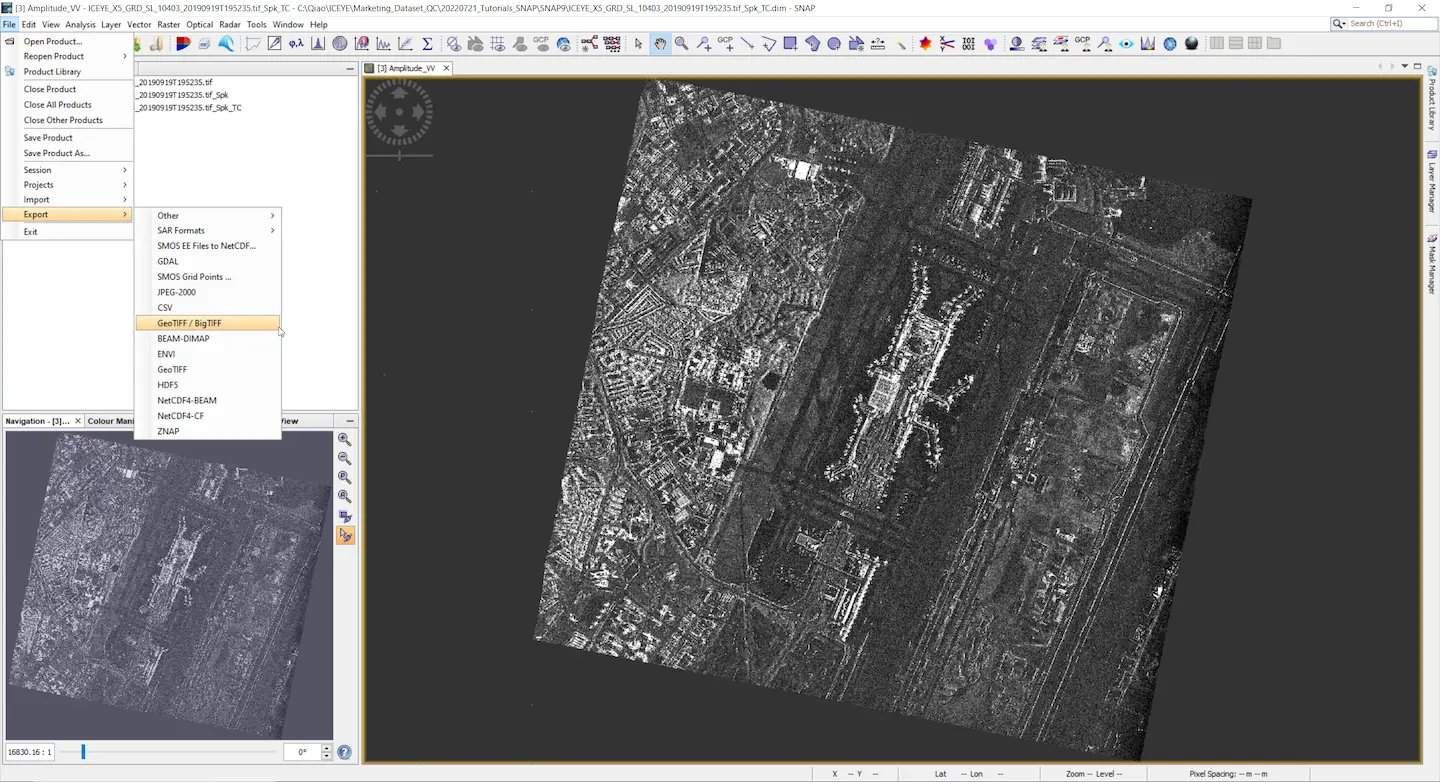
Export to Google Earth KMZ by right clicking on the image window and choose the expected option.
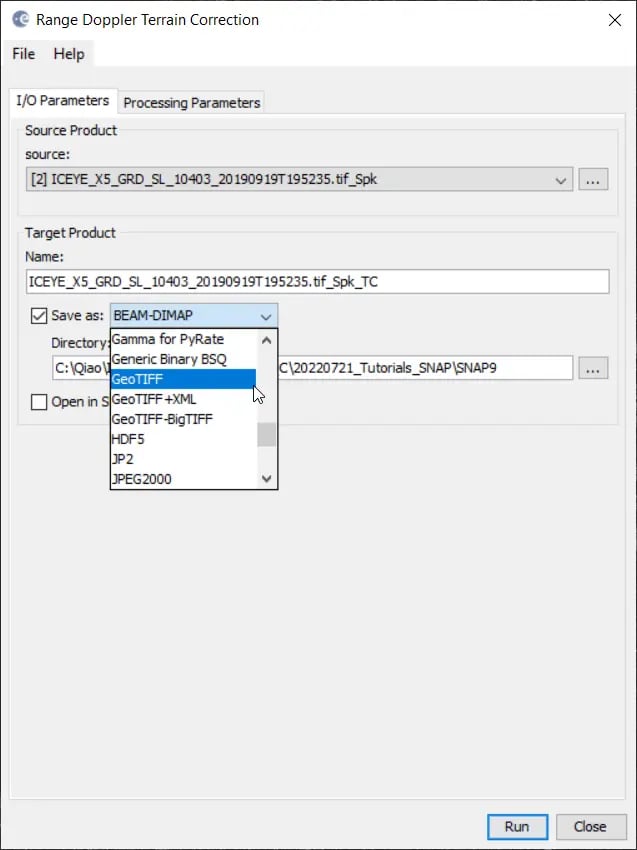
You can also export to GeoTIFF format for inserting the product into GIS platform.
Get the recent Strip dataset and discover the quality of SAR data taken with ICEYE's SAR satellite constellation.